Introduction
Product photography is a genre that requires technical skills and creativity to showcase textures, colors, and themes through images. In this blog post, we will delve into the process of planning and executing a product photography shoot, from creating a mood board to selecting props and gear to editing the final images.
Key Points:
1. Inspiration and Planning
When embarking on a product photography project, it is essential to start with a mood board for inspiration. This board helps in visualizing the overall vibe of the shoot and generates ideas for the creative direction. By exploring different themes and concepts, you can narrow down your focus and set the tone for the images you aim to capture.
2. Prop Selection
Props play a crucial role in product photography as they enhance the visual appeal of the products being showcased. When choosing props, consider factors like textures, colors, and lighting to create a cohesive and visually engaging composition. Experiment with a variety of props such as plates, trays, mirrors, and even food items to add depth and interest to your images.
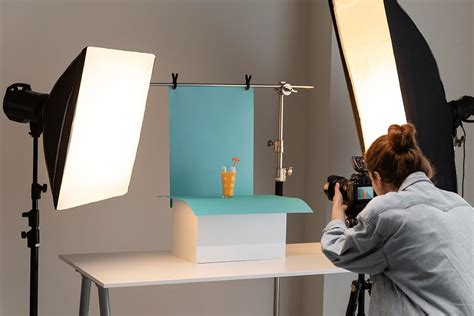
3. Gear Essentials
Having the right gear is essential for capturing high-quality product images. Consider using cameras with high megapixels, versatile lenses like macro lenses for detailed shots, and accessories like tripods for stability. Additionally, ensure you have spare batteries, memory cards, and a laptop for tethered shooting to monitor your images in real-time.
4. Shooting Techniques
When shooting product photos, focus on composition, lighting, and styling to highlight the unique features of each product. Experiment with different angles, perspectives, and backgrounds to create visually appealing images that tell a story. Utilize natural light to create soft, flattering lighting that enhances the textures and colors of the products.
5. Editing and Post-Processing
After capturing your product images, post-processing plays a crucial role in enhancing the final results. Use editing software to adjust colors, contrast, and sharpness, ensuring the images reflect the true essence of the products. Pay attention to details and make subtle enhancements to create polished and professional-looking photographs.
Related Questions:
1. How can a mood board help in the planning process of a product photography shoot?
– A mood board serves as a visual reference for the overall vibe and creative direction of the shoot, helping generate ideas and set the tone for the images.
2. What factors should be considered when selecting props for product photography?
– When choosing props, consider textures, colors, and lighting to create a visually engaging composition that complements the products being photographed.
3. Why is having the right gear essential for capturing high-quality product images?
– The right gear, including cameras, lenses, and accessories, ensures that you can capture detailed and visually appealing product images with clarity and precision.
4. How can shooting techniques impact the outcome of product photography?
– By focusing on composition, lighting, and styling, photographers can highlight the unique features of each product and create visually compelling images that tell a story.
5. What role does editing and post-processing play in product photography?
– Editing and post-processing help enhance the final images by adjusting colors, contrast, and sharpness to create polished and professional-looking product photographs.